How to Integrate with SchoolDay?
Step-by-step guide on integrating your application with the SchoolDay platform.
SchoolDay Sandbox environment offers a controlled, safe, and simulated environment for Application Partners (Vendors) to test their integrations before deployment in the live educational setting. This guide will provide you with step-by-step instructions on how to test the SchoolDay environment from both the district's side, enabling you to import your own data, and from your application's viewpoint.
Overview
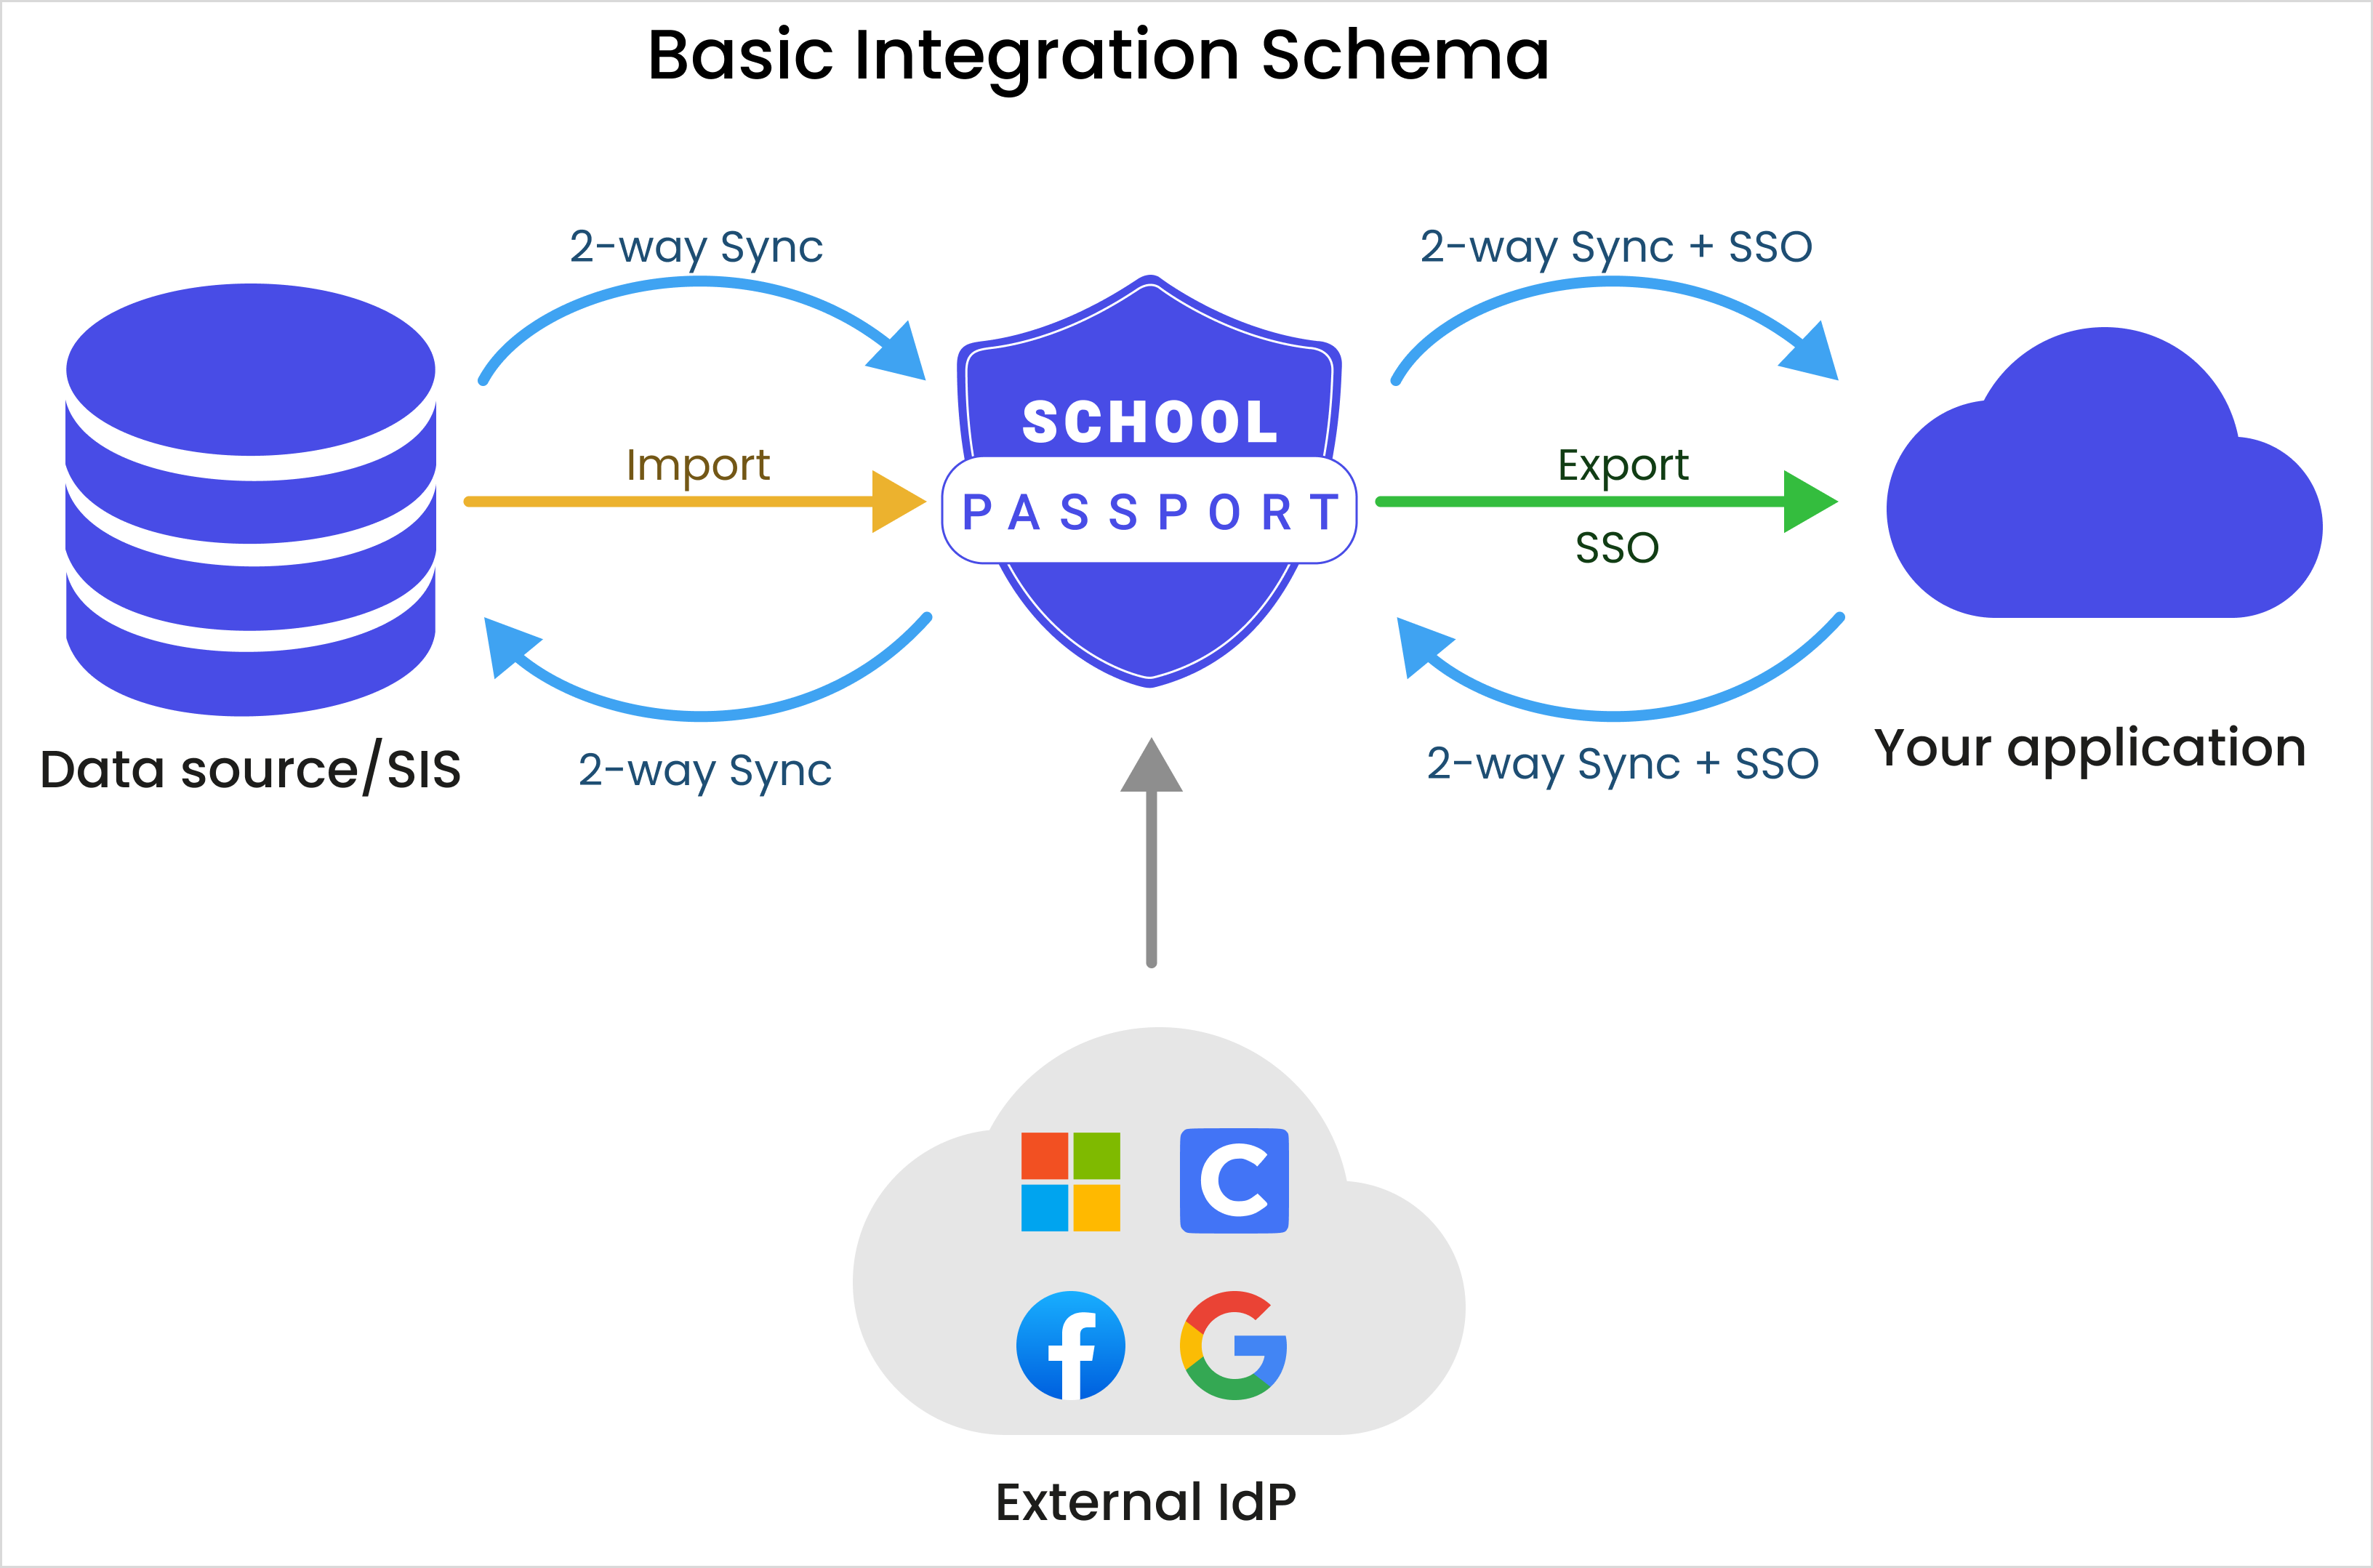
Once you become a member of SchoolDay, you will get access to a full set of data integration mechanisms and SSO technologies. This article provides a brief overview of the integration steps:
- Roster data integration: Completing the SchoolDay Request Form and establishing data integration with the SchoolDay platform on the Sandbox environment.
- SSO and authentication: Implementing Single Sign-On (SSO) and authentication method for customers to authenticate them into your application.
- Application usage: Once data integration and SSO/authentication are in place, organizations can seamlessly work with your applications and invite customers.
Accessing SchoolDay Sandbox
To begin the testing process, please complete the SchoolDay Sandbox Account Request Form. Our Onboarding Team will then create a Sandbox environment specifically for you and provide you with access to it.
Obtaining Sandbox grants you access to two testing accounts: Vendor and District. This access is important for getting familiar with your application with SchoolDay from both perspectives.
Testing from the district side
To begin testing from the district side, follow these steps:
-
Access your district account: Log in to your district account within SchoolDay Sandbox using the provided credentials.
-
Import data via SFTP: SchoolDay allows you to import your district data via Secure File Transfer Protocol (SFTP). Upload your prepared district data using SFTP to populate your district account with the necessary information.
-
Connect to your test application: Once your data is imported, send data sharing request to your application to integrate it within the district's educational system.
-
Establish the connection: When you accept the request within your application, connections will be established and data sharing process begin.
Testing from your side
After successfully importing data, start to test your integration from your side. You can run various test scenarios, including roster data synchronization, and PII Shield.
-
Access your vendor account: Log in to the provided Vendor account within the SchoolDay Sandbox environment.
-
Accept data sharing: You'll receive data sharing from your district account. Accept this request to establish the connection between your application and the imported district data.
-
Initiate testing: Upon accepting the request, proceed with testing your application. Verify the functionality and compatibility of your application within the district's environment.
Updated about 1 year ago