Create an app
Follow the steps in this article to create a new API-based, SFTP-based, or SSO application and connect to districts.
Follow the steps below to create a new application on SchoolDay platform and connect to districts.
Overview
With SchoolDay, you can create and use one of the following apps to consume data:
- API apps utilize API technology to exchange data between systems. The app sends data to the vendor's system using a predefined set of instructions (API), allowing you to retrieve and process the data according to their requirements.
- SFTP apps enable the secure transfer of data, typically CSV files, to a remote folder. The data is sent to the vendor's designated folder using the SFTP protocol, and the vendor can then download and access the data from that folder.
- SSO apps configure single sign-on for district users to access your Vendor application. It facilitates the setup and management of user authentication, allowing district users to log in to the application using their district credentials without needing separate login information. It is recommended to create an SSO application and then reach out to the [email protected] for further configuration assistance.
Once you create an app, publish it to begin collaboration with an educational institution (district). After publishing, your application is displayed in the Application Gallery, and districts can activate it and start the data-sharing.
Create an app flow
- Sign in to SchoolDay.
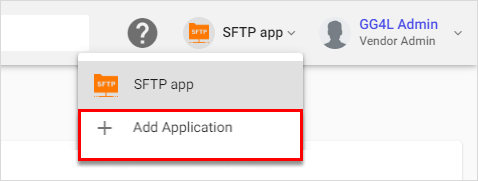
- Select the down for Application > Add Application.
Add basic information
In this step, you create the data displayed to the district in the Application Gallery.
- Enter the following details:
- Application name: Enter a unique name for the app.
- Description (Optional): Type a short description of what the app is or does.
- Website (Optional): Enter a link for your official website.
- Category (Optional): Choose categories, that align with your app.
- Privacy Policy Document: You can upload a PDF document from your computer, paste the URL, or use the built-in document editor to create it. Privacy Policy is reviewed by District Admin before app activation.
- If you want to enable automatic approval of data-sharing requests sent by districts, select Allow Auto Approve of Data Sync Consents. Otherwise, one of the account admins will need to manually accept or reject district requests.
- Once you have completed the application information, click > Next to proceed to the next step and configure the application's functionality.
To edit app properties later, go the Application Settings > Basic.
Create SchoolDay Data API application
- Click SchoolDay Data API.
- Use the following table to enter information in the fields:
| Field | Description |
|---|---|
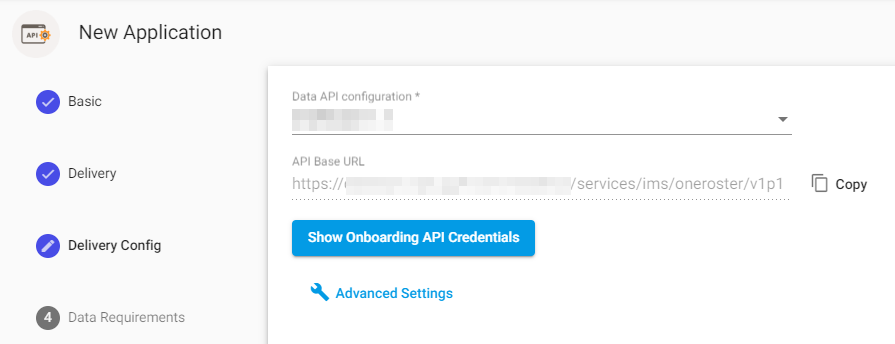
| Data API Configuration | Choose the API you want to retrieve data. Once chosen, in the API Base URL the initial part of the API URL generates. |
| API Base URL | This field is read-only. |
| Show Onboarding API Credentials (optional) | Click to review or copy the credentials (Client ID, Client Secret, API URL) that allow you to retrieve core data on integrated districts, including district name, API keys, last data processing timestamp, integration expiration date, and access errors. These credentials also enable you to automate data sync from SchoolDay and track key metrics for new and existing districts. |
| Advanced Settings (optional) | Click to select appropriate options to manage data delivery. |
- Click > Next.
- (Optional) Set Data Requirements to verify data quality.
- (Optional) Create filter rules.
- Click Finish and Publish.
Create SFTP application
- Click SFTP.
- Use the following table to enter information in the fields:
| Field | Description |
|---|---|
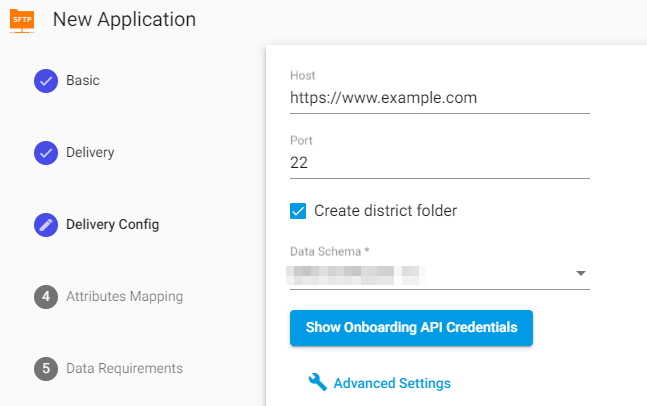
| Host | Enter the link to the SFTP server where the data will be stored. This is a required field. |
| Port | Enter the port number. By default, this is set to 22. |
| Data Scheme | Choose the data schema according to which CSV files will be transferred. This is a required field. |
| Create district folder (optional) | Select to create individual folders on an SFTP server for each district using a current set of SFTP credentials. Usually, when using SFTP, data for each district is located within separate folders with different access credentials. |
| Show Onboarding API Credentials (optional) | Click to review or copy the credentials (Client ID, Client Secret, API URL) that allow you to retrieve core data on integrated districts, including district name, API keys, last data processing timestamp, integration expiration date, and access errors. These credentials also enable you to automate data sync from SchoolDay and track key metrics for new and existing districts. |
| Advanced Settings (optional) | Click to select appropriate options to manage data delivery. |
- Click > Next.
CautionDo not modify the default Entity Mappings and Attributes Mapping to prevent any potential errors.
- (Optional) Configure Entity Mapping rules. Entity Mappings are correspondence between the entities in SchoolDay and CSV file attributes that will be exported to the SFTP server based on the previously chosen Data Schema.
- (Optional) Configure Attribute Mappings. Attribute Mappings are correspondence between the entities in SchoolDay and attributes that will be exported to the SFTP server based on the previously chosen Data Schema.
- (Optional) Set Data Requirements to verify data quality.
- (Optional) Create filter rules.
- Click Finish and Publish.
Create SSO application
- Click SSO Application.
ImportantFurther configuration is unnecessary for SSO applications.
- Click Finish & Publish Application.
Updated about 1 year ago