How to create a promotional banner?
Banner creates to encourage districts to use your application. When a potential customer clicks the call-to-action button in your banner, HTTP POST request gets sent to the configured Webhook URL. The potential customer data then goes directly into your target system.
Before you begin
- Activate auto-provisioning for your application.
Create a banner
-
Go to Application Settings > Provisioning.
-
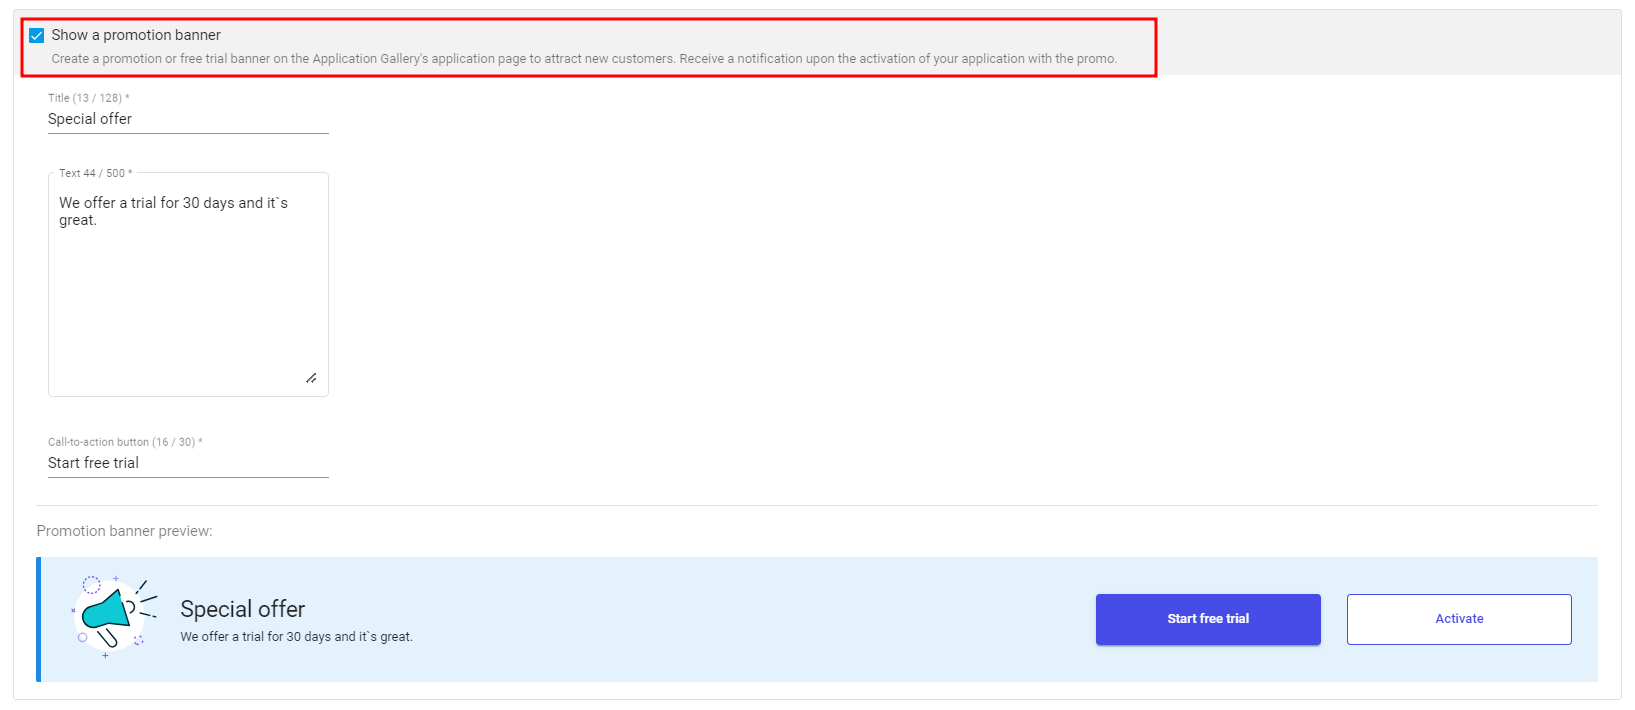
Select Show a promotion banner.
-
Configure the banner details:
- Title: Enter your banner title. For example, "Unlock new capabilities with our application".
- Text: Enter your banner text.
- Call-to-action button: Enter the label for the button that will trigger your webhook. This button will replace the default "Start free trial" button. For example, "Get Started Now!".
-
Preview what the banner will look like to districts in the Application Gallery.
-
Click Save.
Updated about 1 year ago
Did this page help you?